If you are currently working with Exchange 2010 and are allured by the exclusive features in Exchange 2019, then the most important fact to know is that there is no direct method for migrating from Exchange 2010 to Exchange 2019 manually. Also, if you try the double-hop method for the migration, you may end up in chaos as the steps are a little bit technical and complex. The manual migration can be successful but at the cost of your precious time and effort.
A better option is to perform the migration with an automated solution that accomplishes migration without costing the data quality and integrity. Kernel Migrator for Exchange, an advanced migrator, facilitates all the ideal conditions for the safe migration. Users can perform Exchange Server migrations for all versions including Exchange 2019. Automated mapping, CSV file usage, filters and options for data selection, notifications, and reporting facilities are the best of Kernel Migrator for Exchange features. So, before proceeding to the migration procedure of Kernel Migrator for Exchange software, let us know the new features of Exchange 2019.
- Allows adding non-English characters to email addresses with EAI proxy to accepted domains
- Updates to the calendar feature with Do not forward, Out of Office and other management options
- Option for installing Exchange on Windows Server Core is enabled again
- Dynamic Database Cache for providing more cache memory for the active database
- MetaCache Database for working smoothly with larger disks and SSD disks
- Search Index for a mailbox is in the mailbox only rather than on the database.
Now, head on to the important section of this guide i.e., migration of Exchange 2010 to Exchange 2019 with Kernel Migrator for Exchange.
Migrate Exchange 2010 to Exchange 2019 with Kernel Migrator for Exchange
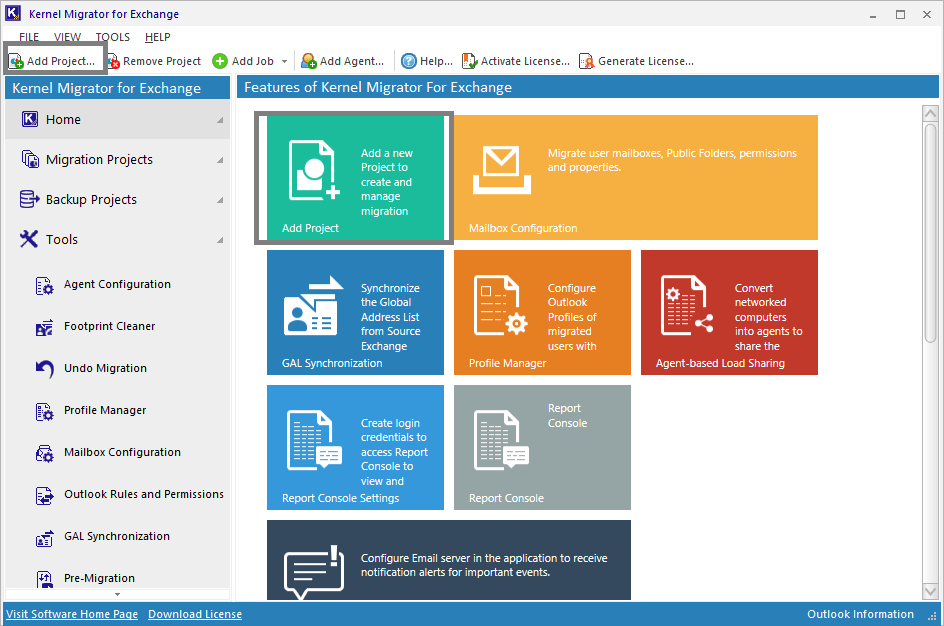
Kernel Migrator for Exchange software is the best software that allows migration between any two versions of Exchange Server. It performs hosted Exchange migration, migration between the same or different domains, etc. With this tool let us perform the migration from Exchange 2010 to Exchange 2019. First, download and install Kernel Migrator for Exchange from https://www.nucleustechnologies.com/exchange-migration/
- Run the migrator software by double-clicking the application icon. Click Add Project to add a project name for the migration.
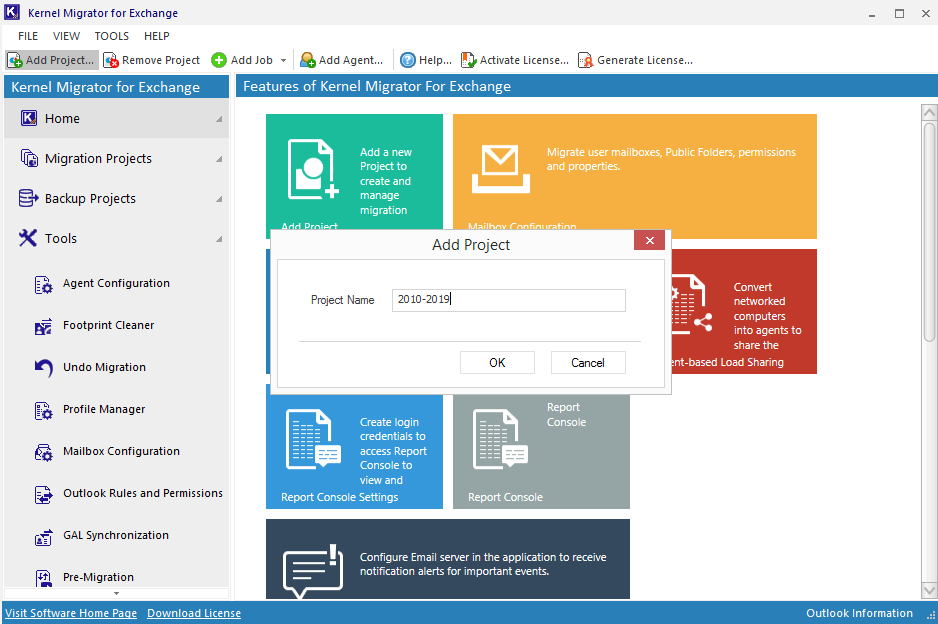
- Provide any name for the project and then click OK.
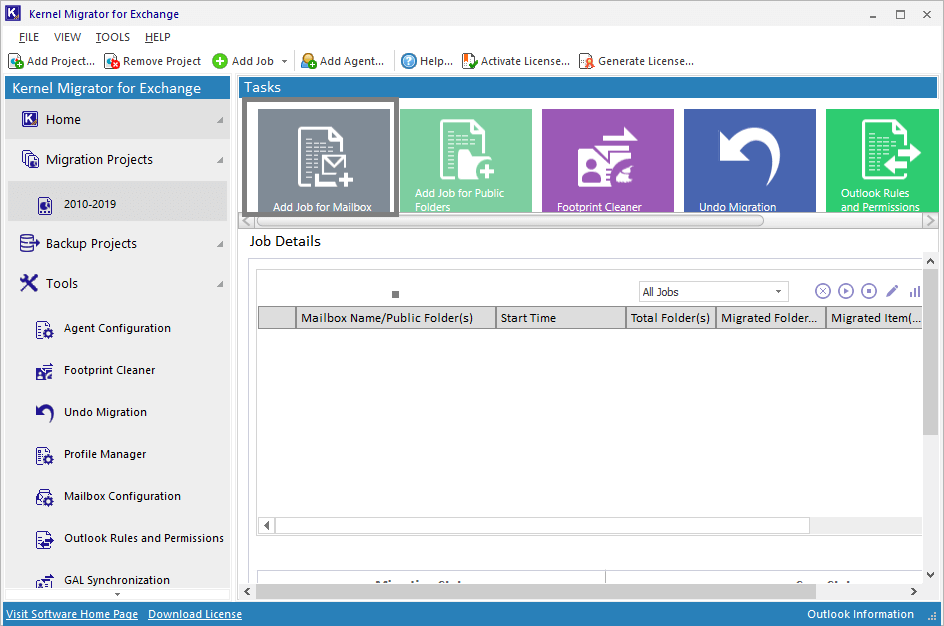
- The project will be created. Now, click Add Job for mailboxes to add a job for mailboxes migration.
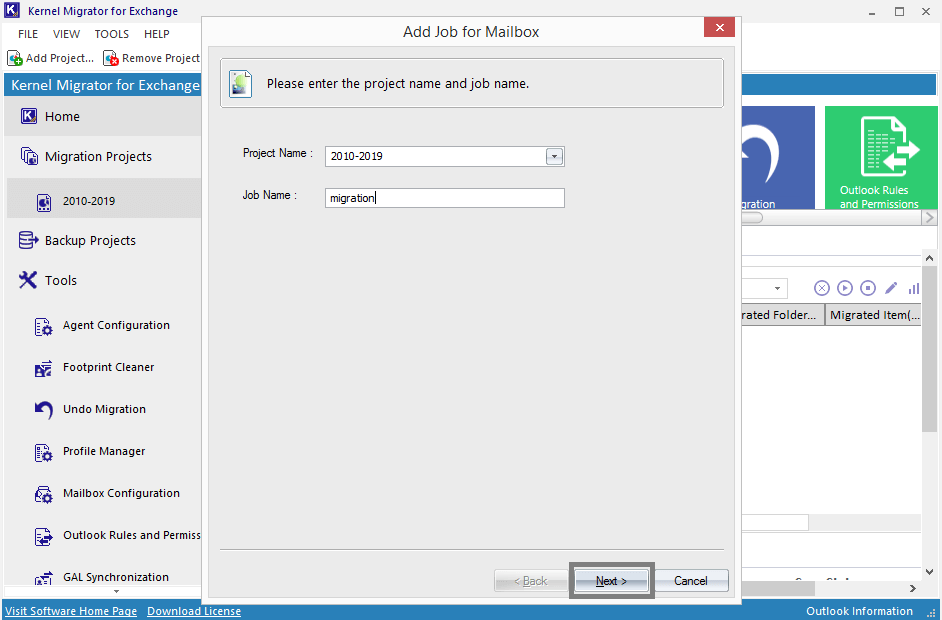
- Provide any name for the job and click OK.
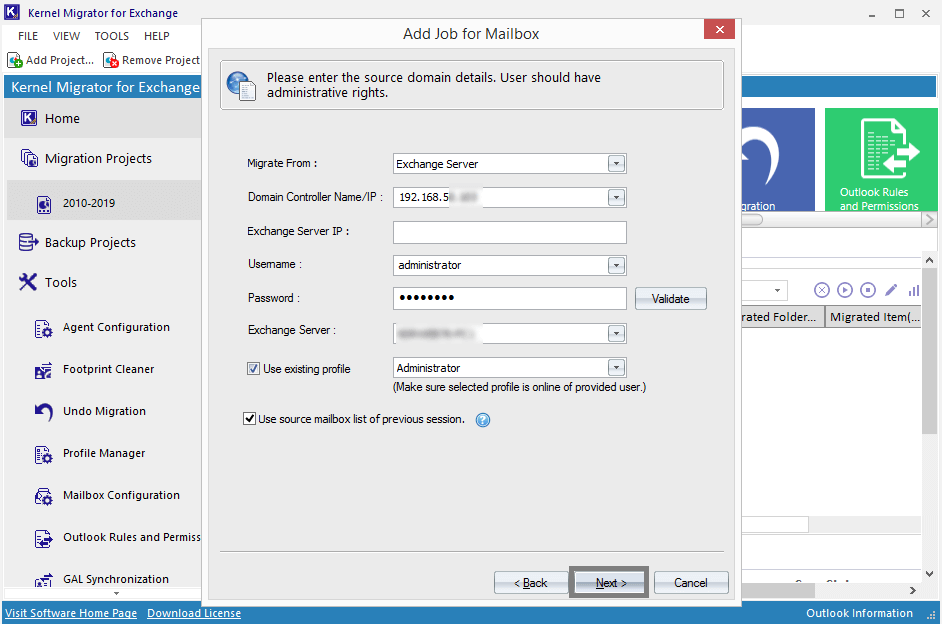
- Now, provide the source Exchange 2010 login details like the domain name or IP address, user name, password, and validate these credentials with Validate button. Use the existing profile and previous session mailboxes options (if required). Then, click Next.
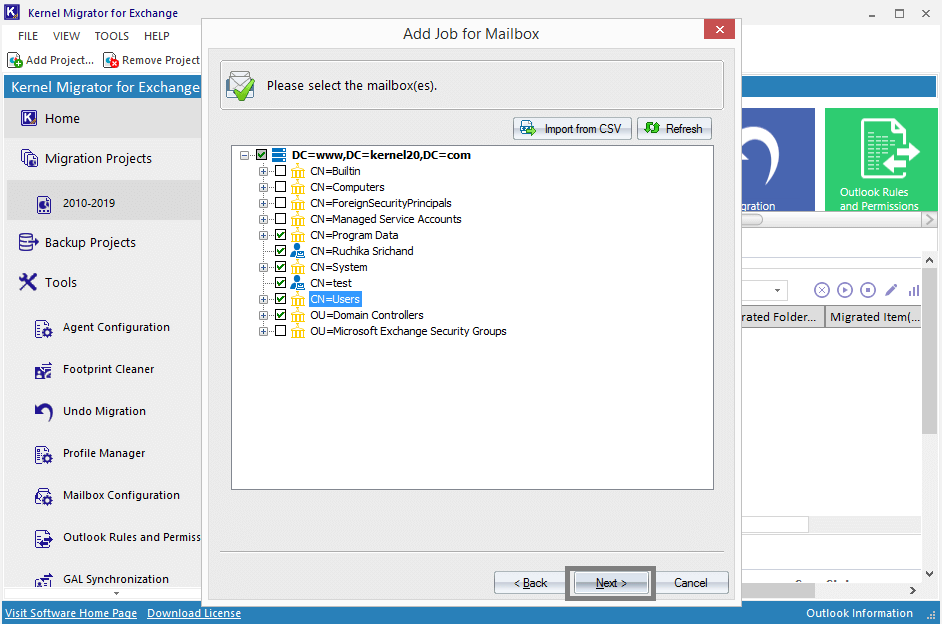
- Choose the source mailboxes you need to migrate and click Next.
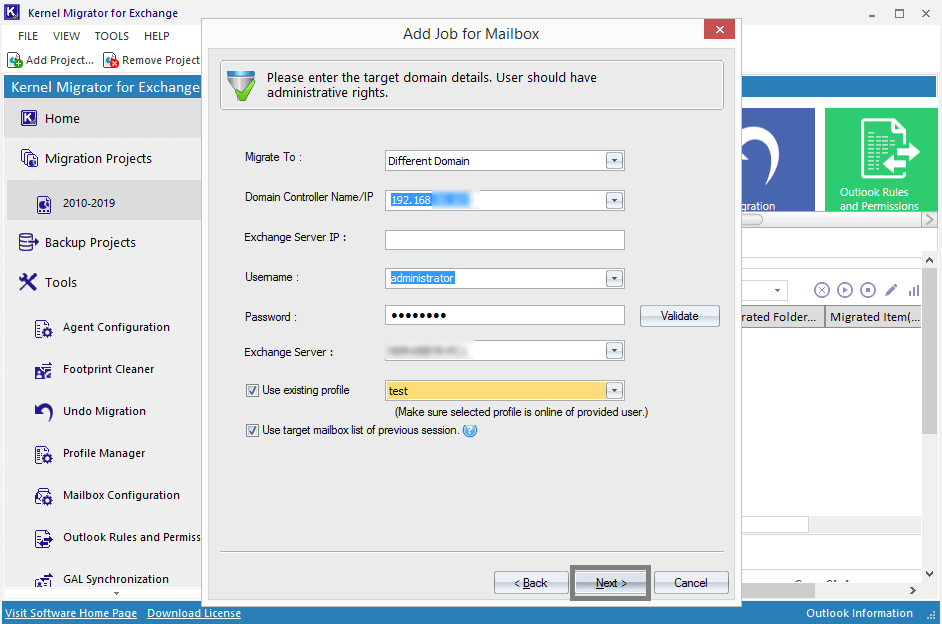
- Now, add the destination Exchange 2019 login details like the domain name or IP address, user name, password, again validate them. Select the given options, if required. Click Next
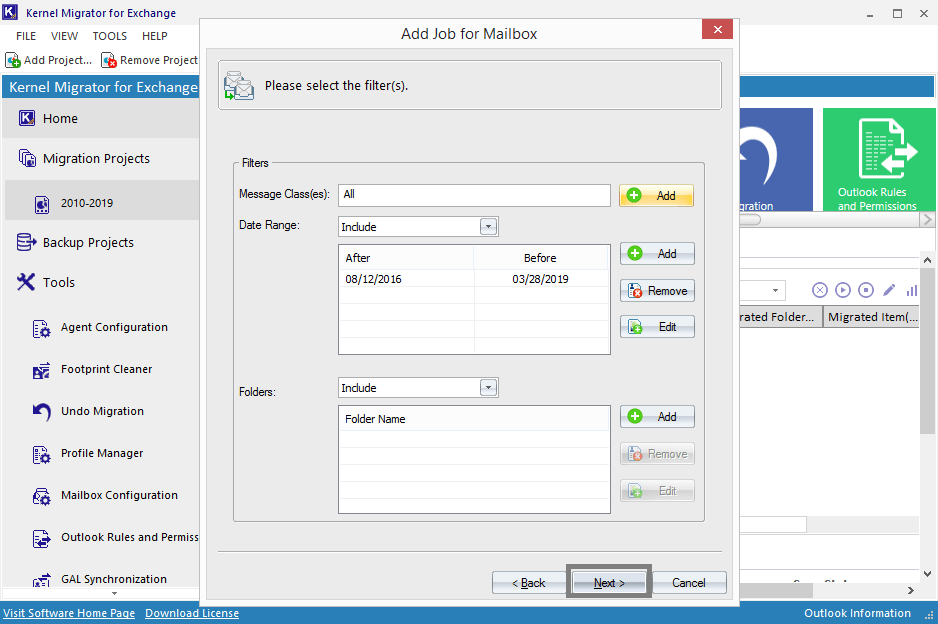
- Add the filter options like Message Classes, Date Filter, Folder Filters, etc. After that, click Next.
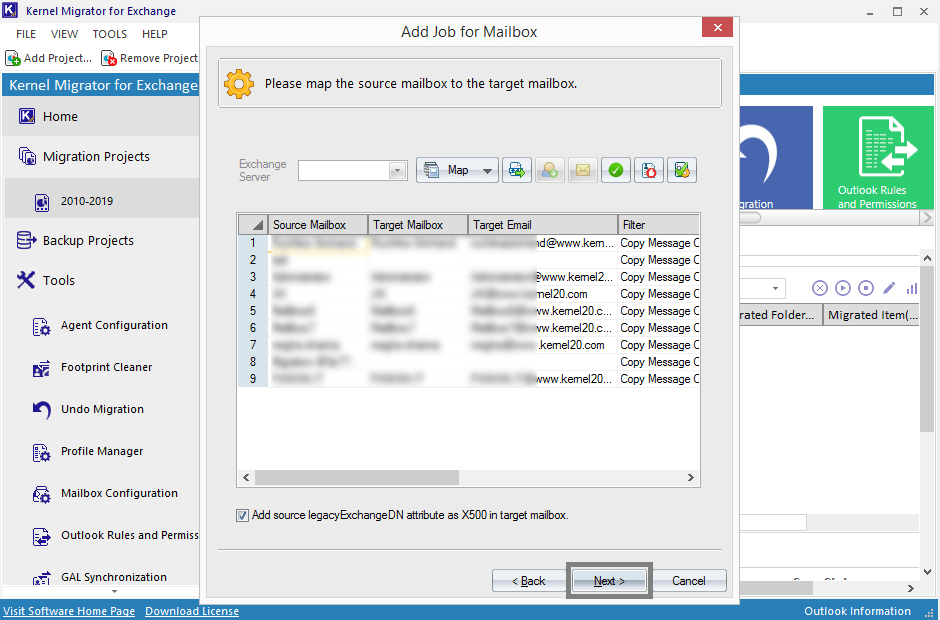
- Map the source mailboxes with the target mailboxes by any method- manually, automatically or using CSV file. Select the checkbox if you require and click Next.
- After the mapping of mailboxes, the user will come across different options for managing the data like managing bad items and synchronization, configuring job and notification settings, scheduling time for migration, report console, etc. Set them as required and click Next.
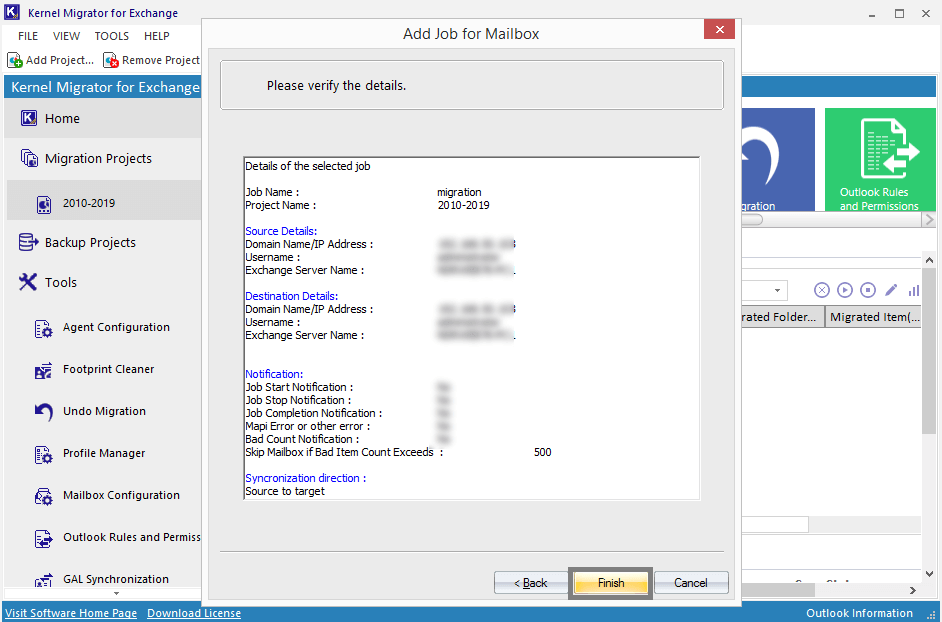
- Then Notification Summary with all details of migration is displayed. Confirm and then click Finish.
- Now the migration gets started and completed based on the amount of data to be migrated. In the end, you will receive migration status as Success.
There you understood all the necessary steps for migrating from Exchange 2010 to Exchange 2019. The migrator solution is the best one that you can rely upon for all type of Exchange migrations.
Conclusion
With every new update in Exchange Server, a need for migration from the previous version arises. For migration from Exchange 2010 to 2019, a professional solution is recommended as there is no direct method for it. The complete discussion of this migration with the best migrator software, Kernel Migrator for Exchange is done here for users. Hope it helped!
The post Step-by-Step Guide for Exchange 2010 to 2019 Migration appeared first on Kernel Data Recovery - Wide range of data recovery softwares.
from Kernel Data Recovery – Wide range of data recovery softwares http://bit.ly/2uH3wVT